
I assumed the reason the engine wouldn’t start was a clogged injector. I’d had the car for about 25 years, with about 120,000 kilometers on the clock. I’d never cleaned or replaced the injectors before. I thought about replacing them with new ones, so I checked with my Subaru dealer. Unfortunately, they said they didn’t have any parts available.
This time I removed the injectors to have them cleaned at a shop.
1 Tools used and costs
Replaced Parts
Tools Purchased
8mm Bolts (100 yen)
Tools Used
Ratchet, Extension Rod, 8mm Socket, Precision Screwdriver, Silicone Spray
2 Task
Remove the driver’s side intake system parts and the passenger side battery. I’ve been removing and reinstalling these parts a few times recently, so I’m getting used to it.
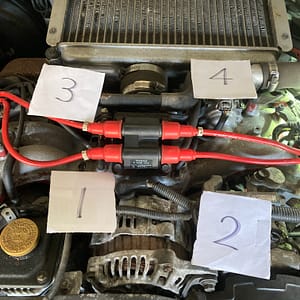
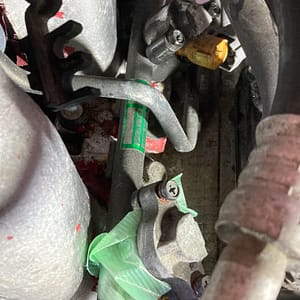
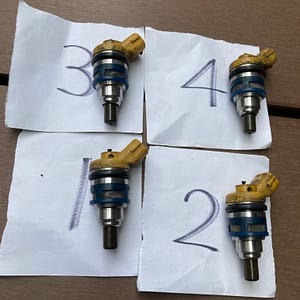
EJ20 Cylinder Numbering
The driver’s side of the front (radiator) side is “1”
The passenger’s side of the front (radiator) side is “2”
The driver’s side of the rear (intercooler) side is “3”
The passenger’s side of the rear (intercooler) side is “4”
It appears to be as shown in the photo.
Injector Removal
This is quite a difficult task for an amateur. I’m nervous, so I’ll take it slow…
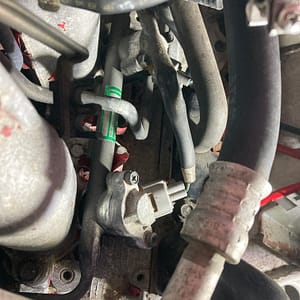
I started the work from the passenger side, which seemed easier. It took an embarrassingly long time. First I removed the gray connector, but I removed it carefully so as not to break it.
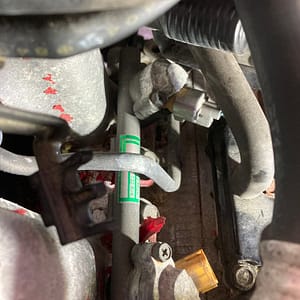
I don’t really know how to remove it, but I tried spraying it with silicone spray. The passenger side connector came off.

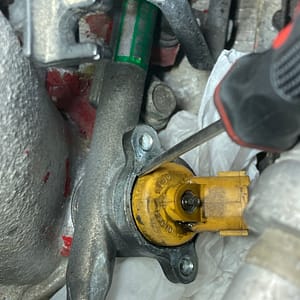
Next, I removed the cap holding the injector in place. The bolt has a positive lead, but I was worried it would strip, so I used an 8mm ratchet. Here too, I worked slowly, using silicone spray to avoid stripping the bolt.
Once the cap was removed, the yellow injector became visible.
I used as small a screwdriver as possible to pry at it, moving it little by little. I was very nervous at first because it wouldn’t budge.
The injector was removed. It was the first time I had ever seen an injector in real life. It was covered in 25 years of dirt.
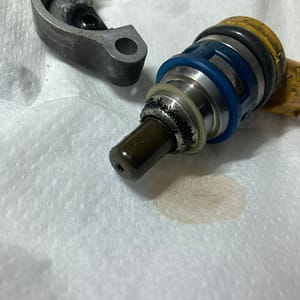
It didn’t come out well in the photo, but the engine side was also quite dirty.

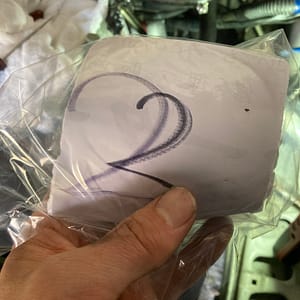
After removing the injector, I covered it to prevent dust from getting in.
I made sure to note the numbers of the removed injectors.
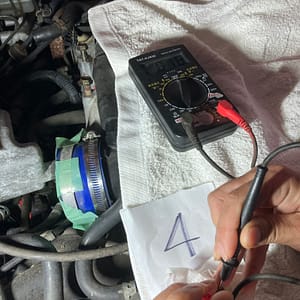
I removed all the injectors and checked the conduction. All four were conducting electricity without any problems, so I was relieved for the time being.
I managed to remove all four injectors safely. I lightly wiped them clean. I wrote the cylinder number on the injector head with a marker and sent it to the shop.
3 Costs to date and next work schedule
The total cost was approximately 80,000 yen, including the 80,000 yen last time and the 100 yen this time.
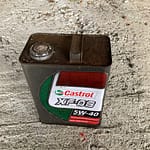
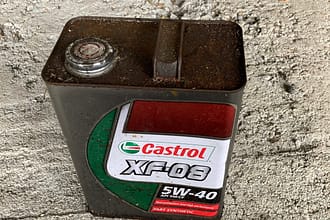
Next time, I’ll get the oil changed while I’m having it cleaned.
Thank you for reading.
DIYで初めてのインジェクターを取り外してみる
エンジンが掛からない原因がインジェクターの詰まりだと想定しました。クルマを購入して約25年。走行距離は約12万キロです。これまでインジェクターの洗浄や交換をしたことがありません。新品に交換しようかと思い、スバルディーラーに確認しました。残念ながら部品は出ないということでした。
今回はインジェクター洗浄をショップさんにお願いするために取り外しました。
1 使った道具と費用
交換したパーツ
購入した道具
8ミリボルト 100円
使った道具
ラチェット、エクステンションロッド、8ミリソケット、精密ドライバー、シリコンスプレー
2 今回の作業
インジェクターはエンジン本体についている(当たり前ですね)ので、水平対向エンジンのプラグ交換と同様に、運転席側の吸気系のパーツ、助手席側のバッテリー等を外します。
最近はこうしたパーツを何度か外したりつけたりしていたので少し慣れてきました。
EJ20の気筒番号
取り外し前に水平対向エンジンの気筒番号をネットで調べてみると、4気筒水平対向エンジンを作るスバルとポルシェでも気筒番号の付け方は異なるようでした。で、スバルは以下のとおり。
前(ラジエター)側の運転席側が「1」
前(ラジエター)側の助手席側が「2」
後(インタークーラー)側の運転席側が「3」
後(インタークーラー)側の助手席側が「4」
のようで、写真のとおりです。
インジェクター取り外し
素人には、なかなかの作業です。緊張するのでゆっくりやることに・・・
作業は作業がしやすそうな助手席側からやりました。恥ずかしいくらい時間がかかりました。最初に灰色のコネクターを外しましたが、割れないように慎重に外します。
外すコツというのはよくわからず、シリコンスプレーを吹いてやってみました。助手側のコネクターが外れました。
次ににインジェクターを抑えているキャップを外します。ボルトにはプラスが切られていますが、おそらく舐めてしまうので、8ミリのラチェットを使いました。ここもボルトを舐めないようにシリコンスプレーを使いながらゆっくりやりました。
キャップが外れて黄色いインジェクターが見えてきました。
できるだけ小さいドライバーでほじほじしながら少しずつ少しづつ動かしながらやります。最初はびくともしなかったのでとても緊張しました。
インジェクターが外れました。初めて生で見たインジェクターで25年の汚れがしっかりと付いていました。
写真ではうまく撮れませんでしたが、エンジン側も結構な汚れでした。
インジェクターを外した後はゴミが入らないように養生をしました。
外したインジェクターのナンバーが分かるようにしておきました。
すべてのインジェクターを外して伝導チェックをしたところ、4本とも問題なく通電してましたのでとりあえず一安心です。
he time being.
なんとか4本とも無事に取り外すことができました。汚れを軽くふいてきれいにした後、インジェクターの頭にマジックで気筒番号を書いてショップさんに送付しました。
3 今回までの費用と次回の作業予定
使った費用は前回の80,000円に今回100円を合わせて、約80,000円となりました。
洗浄をお願いしている間に次回は、オイル交換をしようと思います。
お読みいただきありがとうございました。
\ 最新情報をチェック /