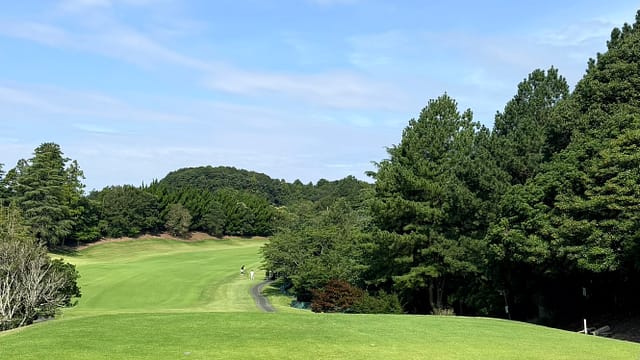
April 2025: Cleaned up the area around the filler pipe of a GC8 Impreza. 2025年4月 GC8インプレッサのフィラー管周りを綺麗にしました

Hello, I’m Ichibariki. This is a blog about an amateur DIY project for a Subaru Impreza. I work on it little by little, leisurely, on my days off work. Thank you for your support.

こんにちは、Ichibarikiです。スバルインプレッサの素人のDIYのブログです。仕事がない日に少しずつ、のんびり作業をしています。よろしくお願いします。

This time I’m going to try to restore the filler pipe myself. I wanted a new filler pipe, so I inquired at the dealer. The GC8 filler pipe was discontinued, and they said they didn’t have any in stock. I’m going to take measures to prevent rust on the actual item.I’m not confident in my English so please forgive any translation errors.

 今回はDIYでフィラー管のレストアに挑戦します。新しいフィラー管が欲しかったのでディーラーに問い合わせました。GC8のフィラー管は廃盤になっていました。そして在庫もないとのことでした。現物に錆対策を施してしていこうと思います。

When I removed the fuel cap and looked inside, it was surprisingly clean and there seemed to be no rust.

給油キャップを外して中を見てみると、内側は意外と綺麗で錆などは無いようです。

There is a filler tube with a cover inside the wheel well of the rear tire on the driver’s side. Looking at it, it is quite rusty. When I tapped on the rusted part, I could feel the thickness of the metal. I felt a little relieved.

 運転席側の後ろタイヤのホイルハウスの中にカバーが付いたフィラー管があります。こちら見ると結構さびています。錆びた部分を叩いてみると、金属の厚みを感じることができました。少し安心しました。

I wanted to remove the filler pipe, but it seemed difficult to do so without removing the rear member. I gave up this time, but I’d like to try again once I’ve removed the rear member.

 フィラー管を外したかったのですが、リアメンバーを外さないとフィラー管の抜き取りが難しそうでした。今回は断念しましたが、リアメンバーを外した際には再挑戦したいです。

This time I’m going to leave it as it is and treat it with rust protector and chassis black.

今回はそのままで錆プロテクターとシャシーブラックで処置しようと思います。

I used tape and vinyl to protect the surface, then applied the rust protector with a brush. I’m not very good at it, but I managed to get it all painted.

テープとビニールで養生して錆プロテクターを筆でペタペタ塗っていきます。上手ではないですが一通り塗れました。

ホイルハウスをシャシーブラックでスプレーします。筆以上にスプレーは難しく自信がないのでボディーを新聞紙で養生しておきます。

I sprayed the chassis black and it was finished. I was afraid of getting it on the body, so I worked cautiously, and it ended up being quite patchy.The removed hoses were put back in place and the job was completed.

シャシーブラックを吹いて完成です。ボディーに付くのが怖くておっかなびっくりで作業したので、かなりまだらになりました。外したホース類を基に戻して完成です。

Thank you for reading.

お読みいただきありがとうございました。

August 2025: Install the rear right parking brake shoe (temporary installation) 2025年8月 右後のサイドブレーキのシューを組み付ける(仮組付け)

With the goal of passing the user vehicle inspection in four years, I will leisurely restore it myself.

4年後にユーザー車検を通す目標で、のんびりとDIYでレストアをやっていきます。

This time, I will install the side brake shoes myself for the first time.

今回は初めて自分でサイドブレーキのシューを組み付けます。

Since some time had passed since I removed it, I did a trial assembly to practice before losing any parts.

取り外してから少し時間が経ったので部品をなくす前に練習も兼ねて仮組付けをしました。

Sorry, I don’t have any photos.

全然写真がなくてごめんなさい

I would like to introduce the necessary tools and parts.

必要な工具や部品を紹介していきたいです。

Thank you for reading.

お読みいただきましてありがとうございました。